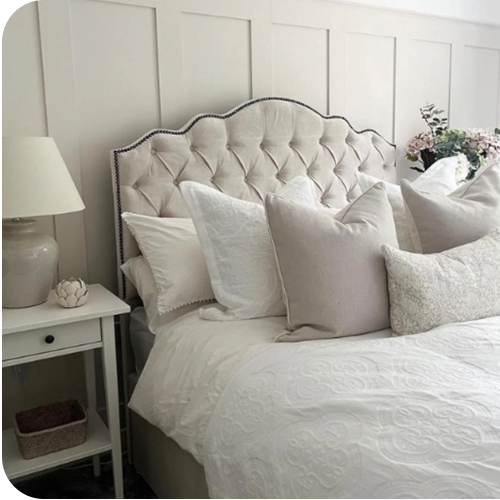
How to Transform Your Old Headboard into Something New
Have you ever looked at your old headboard and wondered how you could give it a fresh and stylish makeover? You’re in luck because in this article, we’re going to explore some exciting and cost-effective ways to transform your old headboard into something new.
Whether you’re a seasoned DIY enthusiast or just starting, these ideas will help you revamp your bedroom without breaking the bank.
Table of contents
A Versatile Headboard

Your headboard plays a crucial role in the aesthetics of your bedroom. It’s not just a functional piece; it can be a statement of your style and personality. However, instead of investing in a brand-new headboard, why not repurpose the one you already have? Let’s dive into the creative world of headboard transformation.
Paint It Anew
The power of a fresh coat of paint is astonishing. By simply changing the color of your headboard, you can give your room an entirely new vibe. Moreover, painting allows you to choose a color that matches your evolving taste and bedroom decor.
Add Upholstery
Adding fabric upholstery can instantly make your headboard look chic and comfortable. This DIY project is perfect for those who want to bring a touch of luxury to their bedroom. In addition, upholstery allows you to experiment with different textures and patterns.
Create a Wood Feature

If you have a wooden headboard, consider transforming it into a rustic or modern wood feature. This can be achieved by distressing the wood, staining it in a new shade, or even creating a weathered effect. This approach brings a sense of warmth and character to your bedroom.
Wall Decals and Stencils

For a quick and easy transformation, use wall decals or stencils to embellish your headboard. This is a fun and playful way to express your creativity. However, the best part is that it can be easily changed whenever you wish.
Getting Started
Now that we’ve explored some ideas, let’s discuss how to get started with your headboard transformation project.
| Step | Task | Details and Tips |
| 1 | Plan Your Design | – Visualize your design, consider color, style, patterns. |
| 2 | Gather Materials and Tools | – Create a checklist of materials and tools required. |
| 3 | Prepare Your Workspace | – Clear the area of clutter. – Use drop cloths or plastic sheets. – Ensure good ventilation and lighting. |
| 4 | Safety First | – Wear protective gear as needed (goggles, gloves, mask). – Read labels and follow safety instructions. |
| 5 | Remove the Headboard | – Carefully detach it from the bed frame. – Keep track of screws or fasteners for reattachment. |
| 6 | Clean and Prep the Headboard | – Clean the surface and consider sanding if needed. |
| 7 | Follow Your Design Plan | – Apply paint, fabric, or decorative elements according to plan. |
| 8 | Allow for Drying Time | – Follow recommended drying times from product labels. |
| 9 | Reattach the Headboard | – Carefully reattach using the same screws or fasteners. |
| 10 | Clean Up | – Clean the workspace. – Dispose of waste properly. – Safely store tools for future use. |
Transformation Process
With all your materials in place, it’s time to dive into the transformation process itself. Here’s how you can make your old headboard look new and exciting.
Step 1 – Sand and Clean
If you’re painting or staining your headboard, start by sanding the surface to create a smooth canvas. Clean the headboard thoroughly to remove any dust and dirt.
Step 2 – Paint or Upholster
This step will depend on the method you’ve chosen. Paint your headboard with smooth, even strokes, allowing each coat to dry before applying the next. If you’re upholstering, carefully wrap the fabric around the headboard and secure it in place.
Step 3 – Add Finishing Touches
Now, it’s time to add the finishing touches. Whether it’s decorative nails, wall decals, or stencils, let your creativity shine.
Readmore: 5 DIY Headboard Ideas
Conclusion
Giving your old headboard a new lease on life is an exciting and budget-friendly way to refresh your bedroom. Whether you choose to paint it, upholster it, create a wood feature, or use decals, the possibilities are endless. Moreover, this project allows you to express your personality and style through your home decor. So, get started on your headboard transformation today and watch your bedroom come to life with a touch of your creativity.
FAQs
Not at all! With the right materials and a bit of creativity, transforming your headboard can be a fun and rewarding DIY project.
The time required depends on the complexity of your chosen project. Simple projects like painting may take a day, while more intricate upholstery may take a weekend.
Absolutely! That’s the beauty of DIY transformations. You can always update or change your headboard’s look to match your evolving style.
Yes, safety is crucial. Ensure good ventilation when using paint and adhesives, and be cautious with tools to avoid accidents.


