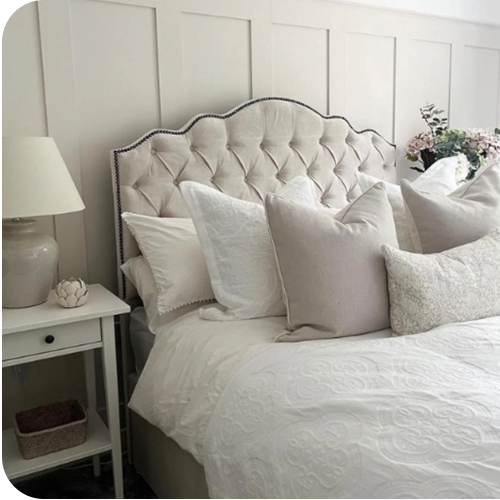
How to Attach a Headboard to a Wall: Transforming Your Bedroom
Headboards serve as striking focal points in bedrooms, adding both aesthetic value and practicality to your sleeping space. While freestanding headboards are popular, attaching a headboard to a wall offers stability and style. Understanding how to securely affix a headboard to your wall is essential for creating a polished bedroom ambiance.
Table of contents
Understanding Headboard Types:
Headboards come in various styles, from upholstered and wooden to metal and composite materials. Each type boasts unique characteristics that impact both design and installation.
| Headboard Type | Description | Characteristics | Installation |
| Upholstered | Covered with fabric or leather, offers cushioning and comfort. | Soft, padded surface, variety of colors and textures. | Typically attached to the bed frame with screws or bolts. |
| Wooden | Crafted from wood, available in various finishes and designs. | Durable, classic look, versatile styles. | Attaches to the bed frame or wall using screws or mounting brackets. |
| Metal | Made from metal, often wrought iron or steel. | Sleek, modern appearance, sturdy construction. | Attached to the bed frame with bolts or brackets. |
| Composite | Constructed using engineered wood or other composite materials. | Affordable, lightweight, diverse designs. | Mounts to the bed frame using screws or brackets. |
Tools and Materials Required
Before diving into the attachment process, gathering the necessary tools and materials ensures a smooth installation experience. From drills and screws to brackets and levelers, a comprehensive list aids in preparedness.
- Drill: A tool used for creating holes in surfaces, crucial for affixing brackets securely.
- Screws: Fasteners that join materials together, essential for attaching brackets during installation.
- Brackets: Supportive elements providing structural integrity and stability to the attached object or fixture.
- Levelers: Tools aiding in ensuring the installation is even and balanced.
- Measuring tape: Used for accurate measurements, ensuring precise placement of brackets.
- Pencil: To mark drill points or measurements on the surface.
- Screwdriver: Essential for turning screws and securing brackets in place.
- Wall anchors: Necessary for securing brackets in walls without studs for added stability.
- Stud finder: A device used to locate studs or beams behind walls for more secure installations.
Preparing the Wall and Bed Area

Measuring and Marking
Accurate measurements and precise markings on the wall and bed area lay the groundwork for a successful attachment. This step involves ensuring alignment and proper spacing for the headboard.
Ensuring Proper Alignment
Aligning the headboard with the bed frame and wall markings optimizes the final appearance and structural integrity of the installation.
Step-by-Step Guide: Attaching a Headboard
Securing Techniques for Different Wall Types
Different walls demand specific securing techniques. From drywall to concrete, knowing the appropriate methods for each surface type prevents potential damage.
Anchoring the Headboard Safely
Step-by-step instructions on securely anchoring the headboard, utilizing suitable hardware and ensuring stability for long-term use. Highlighting common errors during installation helps in circumventing potential mishaps and ensures a smooth attachment process.
Safety Measures and Tips for Durability
Incorporating safety precautions and maintenance tips enhances the longevity and safety of the installed headboard.
Decorative Ideas and Styling Tips
Exploring creative ways to style and accentuate the attached headboard, transforming the bedroom into a captivating sanctuary. Acknowledging scenarios where seeking professional help becomes imperative, ensuring safety and precision in complex installations.
| Decorative Ideas and Styling Tips | Seeking Professional Help |
| 1. Wall Art | Consider professional assistance if planning to install heavy or intricate wall art above the headboard. A professional can ensure proper anchoring and safety measures for secure installation. |
| 2. Statement Lighting | Seeking professional electrician services is recommended for installing elaborate or complex lighting fixtures above the headboard. This ensures safety and proper wiring connections. |
| 3. Accent Pillows | No professional help required. Experiment with various pillow sizes, textures, and patterns to complement the headboard’s style and color scheme. |
| 4. Hanging Canopy or Drapes | Seek assistance if planning to hang a canopy or drapes from the ceiling around the headboard. Professionals can ensure proper installation without damaging the ceiling or the headboard. |
| 5. Headboard Decals or Murals | If considering intricate or large decals or murals, professional help might be necessary for precise application and to avoid any damage to the headboard material. |
Conclusion
conclusion, understanding the nuances of attaching a headboard to a wall elevates the bedroom’s ambiance while ensuring safety and aesthetics. With careful planning, suitable tools, and a methodical approach, this process becomes an enriching DIY experience.
FAQs
While freestanding headboards are an option, wall attachment ensures stability and a seamless appearance.
Tools like a drill, screws, levelers, and appropriate anchors are crucial for a secure attachment.
Different wall types require specific anchoring methods, ensuring a safe and durable attachment.
casional checks on screws and brackets maintain the headboard’s condition.


